> ## Documentation Index
> Fetch the complete documentation index at: https://docs.kubestacks.com/llms.txt
> Use this file to discover all available pages before exploring further.
# Install the desktop app
> Download KubeStacks for macOS, Windows or Linux, and open your first cluster in under a minute.
The desktop app reads clusters from the same place `kubectl` does, and keeps your credentials on your computer. You don't need `kubectl` installed.
The website picks the right installer for your computer. Every installer is also on the [latest GitHub release](https://github.com/KubeStacks/KubeStacks/releases/latest).
## Install
For macOS 12 or later, on Apple silicon and Intel. The app is signed and notarized by Apple.
Pick the one for your Mac:
| Mac | File |
| - | - |
| Apple silicon (M1 and later) | `KubeStacks--mac-arm64.dmg` |
| Intel | `KubeStacks--mac-x64.dmg` |
Not sure which you have? Choose **Apple menu → About This Mac**, and look at **Chip** or **Processor**.
Open the `.dmg`, and drag **KubeStacks** into the **Applications** folder.
Open KubeStacks from Applications, Launchpad or Spotlight. It finds your clusters straight away.
Prefer a `.zip`? Each release has one for Apple silicon and one for Intel, next to the disk images.
For Windows 10 or later. One installer covers x64 and arm64.
Download `KubeStacks--win.exe`.
Open the installer, and follow its steps. You can choose the folder KubeStacks goes in, and it adds a shortcut to your desktop.
The Windows installer isn't code-signed yet, so Windows may say it protected your PC. Choose **More info**, then **Run anyway**. You can check the file first: see [Verify your download](#verify-your-download).
For a recent 64-bit distribution, on x64 and arm64.
| Format | x64 | arm64 |
| - | - | - |
| AppImage, for any distribution | `linux-x86_64.AppImage` | `linux-arm64.AppImage` |
| Debian, Ubuntu | `linux-amd64.deb` | `linux-arm64.deb` |
| Fedora, RHEL, openSUSE | `linux-x86_64.rpm` | `linux-aarch64.rpm` |
Each file name starts with `KubeStacks--`.
```bash AppImage theme={"theme":{"light":"github-light","dark":"github-dark-default"}}
chmod +x KubeStacks-*-linux-x86_64.AppImage
./KubeStacks-*-linux-x86_64.AppImage
```
```bash Debian and Ubuntu theme={"theme":{"light":"github-light","dark":"github-dark-default"}}
sudo apt install ./KubeStacks-*-linux-amd64.deb
```
```bash Fedora and RHEL theme={"theme":{"light":"github-light","dark":"github-dark-default"}}
sudo dnf install ./KubeStacks-*-linux-x86_64.rpm
```
## Open your first cluster
KubeStacks starts on a list of every cluster in your kubeconfig, each with a status: its Kubernetes version and how fast it answered, or why it can't be reached.
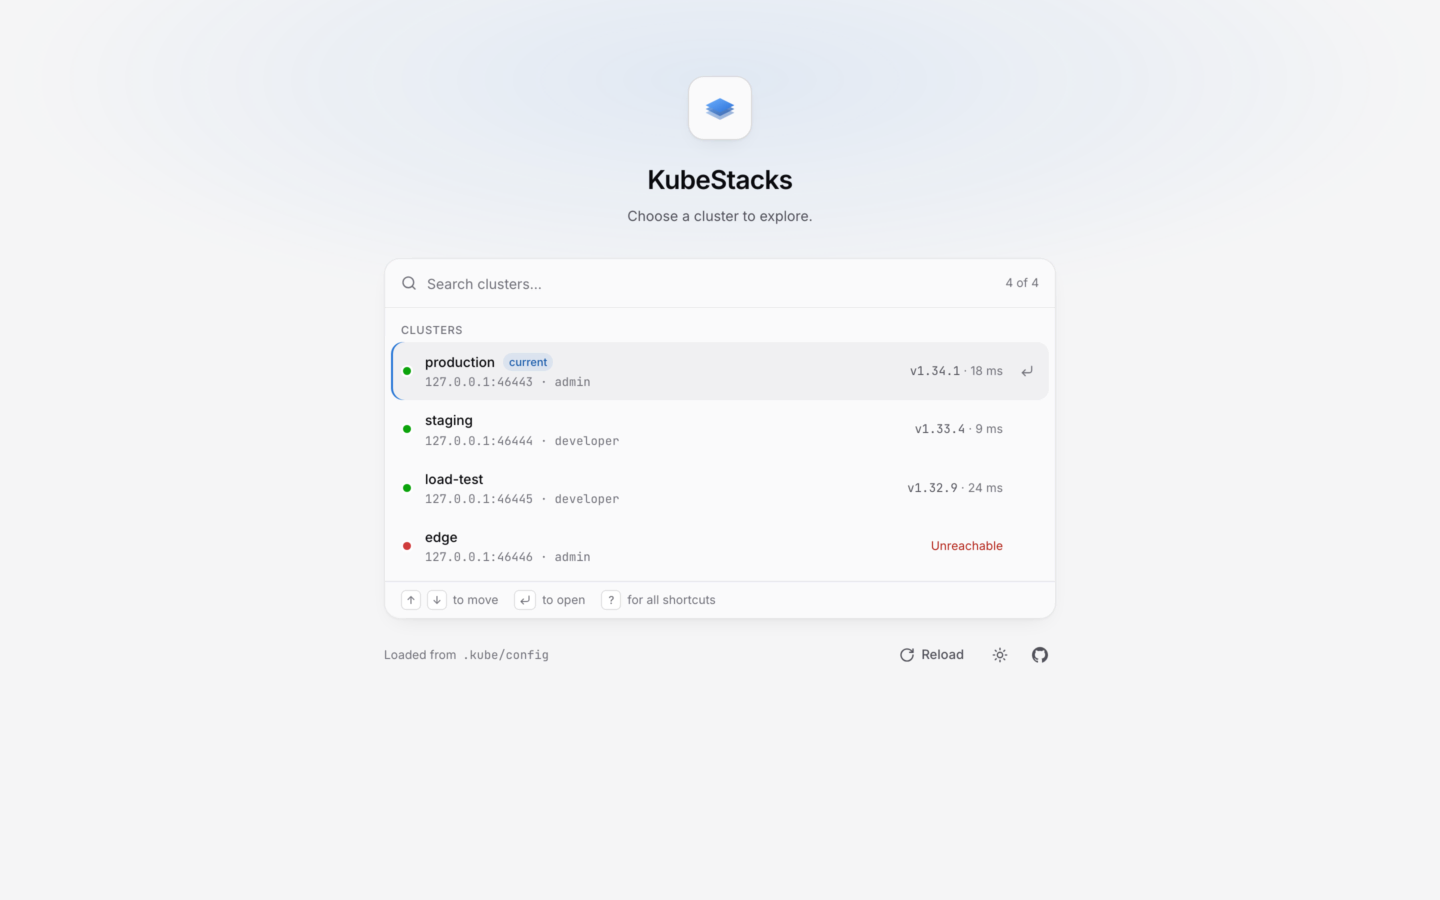
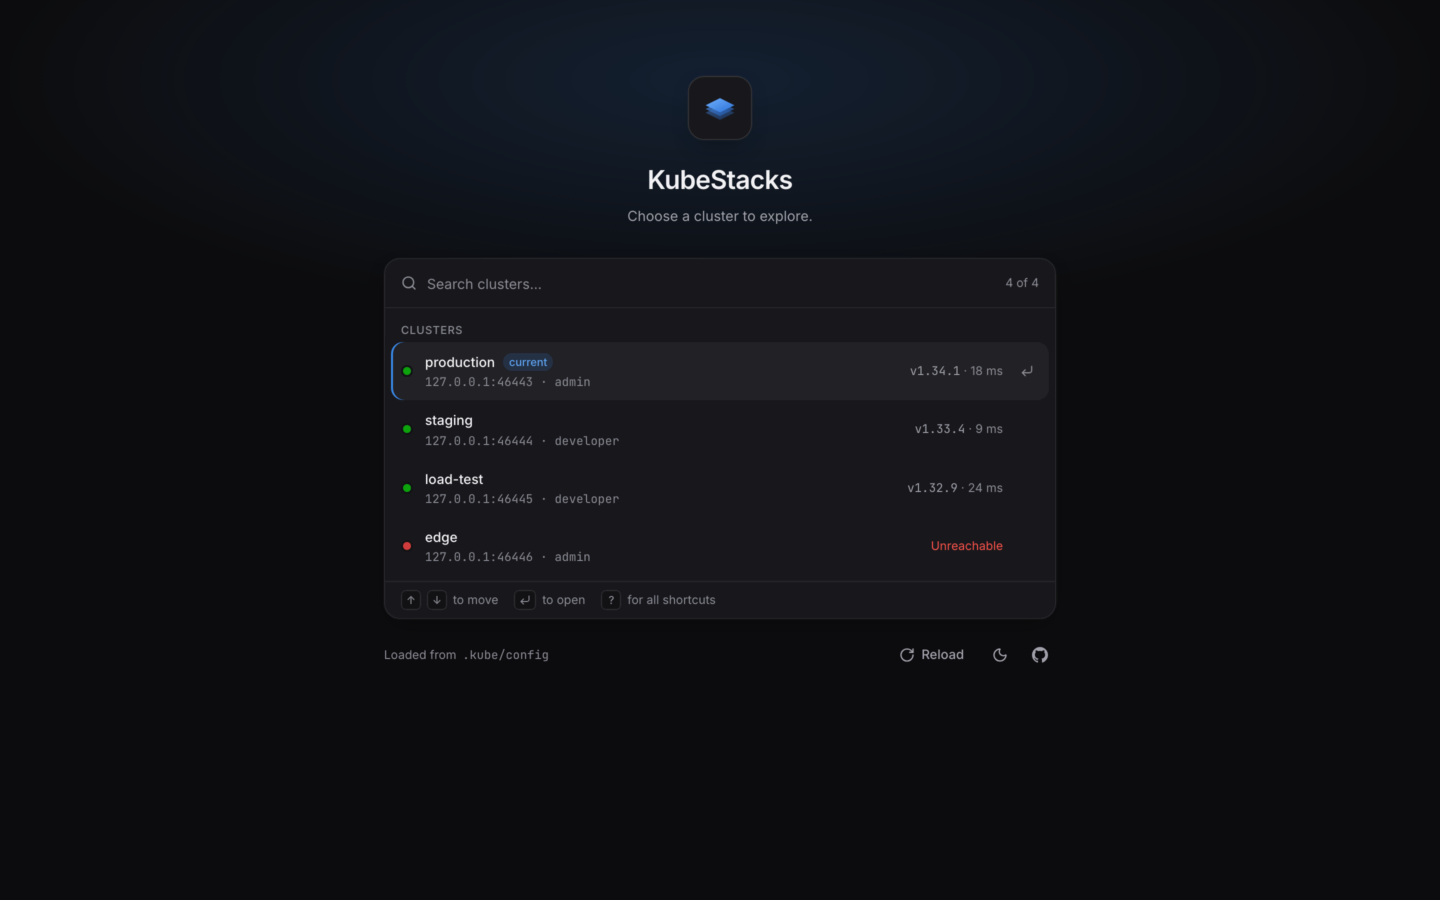 Pick one with the mouse, or with ↑ ↓ and ↵. The overview opens, and you're in.
Five minutes through the app's main ideas.
Multiple kubeconfigs, credential plugins, and what each status means.
## Staying up to date
KubeStacks keeps itself up to date. It looks for a new version shortly after it starts and every few hours after that, downloads it in the background, and installs it when you quit. When one is ready, a notice says so, with **Restart now** and **What's new**. Close it, and the new version installs when you quit.
* **Help → Check for Updates…** looks right away.
* **Help → Check for Updates Automatically** turns the background checks off.
New versions come from the project's [GitHub releases](https://github.com/KubeStacks/KubeStacks/releases), over HTTPS. Each download is checked against the checksum the release lists, and on macOS the new version must carry the same Developer ID signature. A copy that can't update itself says so when you check: install new versions of it from the releases page.
## Verify your download
Every release lists the SHA-256 checksum of each installer in `SHA256SUMS.txt`, and each file has a signed build provenance attestation.
```bash Checksum (macOS, Linux) theme={"theme":{"light":"github-light","dark":"github-dark-default"}}
# In the folder with the installer and SHA256SUMS.txt
shasum -a 256 --ignore-missing -c SHA256SUMS.txt
```
```powershell Checksum (Windows) theme={"theme":{"light":"github-light","dark":"github-dark-default"}}
Get-FileHash .\KubeStacks-1.2.0-win.exe -Algorithm SHA256
# Compare with the line for this file in SHA256SUMS.txt
```
```bash Provenance (GitHub CLI) theme={"theme":{"light":"github-light","dark":"github-dark-default"}}
gh attestation verify KubeStacks-1.2.0-mac-arm64.dmg --repo KubeStacks/KubeStacks
```
## Requirements
Pick one with the mouse, or with ↑ ↓ and ↵. The overview opens, and you're in.
Five minutes through the app's main ideas.
Multiple kubeconfigs, credential plugins, and what each status means.
## Staying up to date
KubeStacks keeps itself up to date. It looks for a new version shortly after it starts and every few hours after that, downloads it in the background, and installs it when you quit. When one is ready, a notice says so, with **Restart now** and **What's new**. Close it, and the new version installs when you quit.
* **Help → Check for Updates…** looks right away.
* **Help → Check for Updates Automatically** turns the background checks off.
New versions come from the project's [GitHub releases](https://github.com/KubeStacks/KubeStacks/releases), over HTTPS. Each download is checked against the checksum the release lists, and on macOS the new version must carry the same Developer ID signature. A copy that can't update itself says so when you check: install new versions of it from the releases page.
## Verify your download
Every release lists the SHA-256 checksum of each installer in `SHA256SUMS.txt`, and each file has a signed build provenance attestation.
```bash Checksum (macOS, Linux) theme={"theme":{"light":"github-light","dark":"github-dark-default"}}
# In the folder with the installer and SHA256SUMS.txt
shasum -a 256 --ignore-missing -c SHA256SUMS.txt
```
```powershell Checksum (Windows) theme={"theme":{"light":"github-light","dark":"github-dark-default"}}
Get-FileHash .\KubeStacks-1.2.0-win.exe -Algorithm SHA256
# Compare with the line for this file in SHA256SUMS.txt
```
```bash Provenance (GitHub CLI) theme={"theme":{"light":"github-light","dark":"github-dark-default"}}
gh attestation verify KubeStacks-1.2.0-mac-arm64.dmg --repo KubeStacks/KubeStacks
```
## Requirements
macOS12 or later
Windows10 or later
LinuxRecent, 64-bit
Kubernetes1.25 or later
* **kubectl** isn't needed. KubeStacks talks to the API server itself.
* **[Helm](https://helm.sh)** is needed only to change Helm releases. Looking at them needs nothing.
* **Kubernetes 1.27 or later** lets KubeStacks explain fields from the cluster's own OpenAPI schema. Older clusters work, without the explanations.
Want to build it yourself? See [Build from source](/reference/build-from-source).
This documentation is built and hosted on [Mintlify](https://mintlify.com), a developer documentation platform.